Why Aweber
Hey Hustle and Grind Fam! Trecia here, and if you’re anything like me, you love the idea of making money while you sleep. And guess what? Email marketing, when done right, is your 24/7 sales team. But “done right” doesn’t mean manually sending emails every day. Oh no. It means automation!
Today, we’re diving deep into AWeber Automation. If you’re using AWeber (and if you’re not, you should be checking it out!), this tutorial will show you exactly how to set up powerful automations that nurture your audience, sell your products, and reclaim your precious time. No tech headaches, just pure “set it and forget it” brilliance!
Let’s turn your AWeber account into a Bed-Office powerhouse.
Why AWeber Automation is Your Secret Weapon
Before we jump into the “how,” let’s quickly cover the “why.” Automation in AWeber isn’t just about saving time (though it does that beautifully). It’s about:
-
- Consistent Engagement: Every new subscriber gets the same warm welcome and valuable content, every single time.
-
- Targeted Messaging: Deliver specific messages to specific people based on their interests.
-
- Scalability: Whether you have 100 subscribers or 100,000, your automations work tirelessly.
-
- Passive Income Potential: Sell products, promote affiliates, and drive traffic to your content—all on autopilot.
Ready to build your email machine? Let’s get to it!
Step 1: Understanding AWeber Automations (Campaigns)
AWeber calls its automation sequences “Campaigns.” Think of a Campaign as a roadmap for your subscribers. Once they start on this road, they’ll automatically receive a series of emails, waits, and actions you’ve pre-designed.
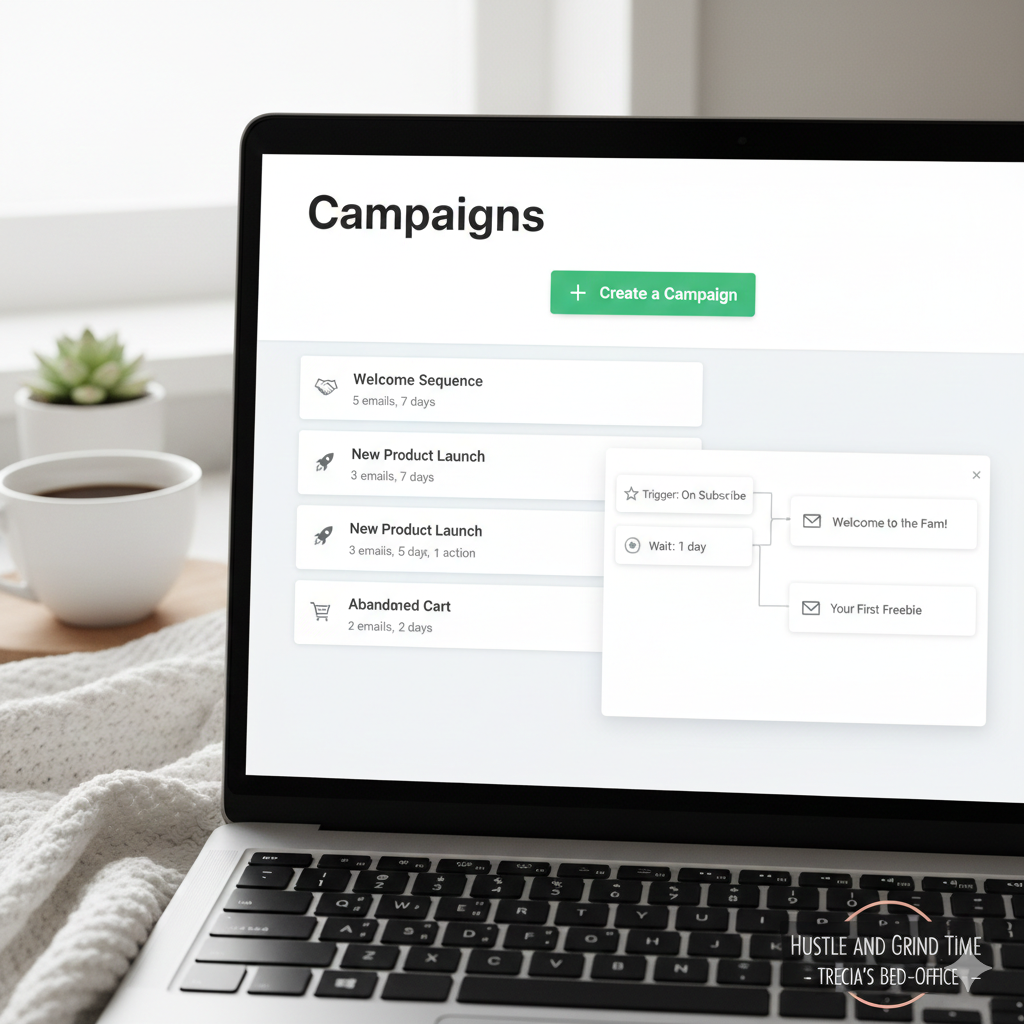
To find your Campaigns, log into AWeber, and on the left-hand navigation, click “Campaigns.”
Step 2: Creating Your First Automation Campaign (The Welcome Sequence)
Every subscriber deserves a warm welcome! This is the most crucial automation you’ll set up. It builds trust, delivers your freebie, and sets the tone for your relationship.
-
- Click “Create a Campaign”: Once on the Campaigns page, you’ll see a big green button that says “+ Create a Campaign.” Click it!
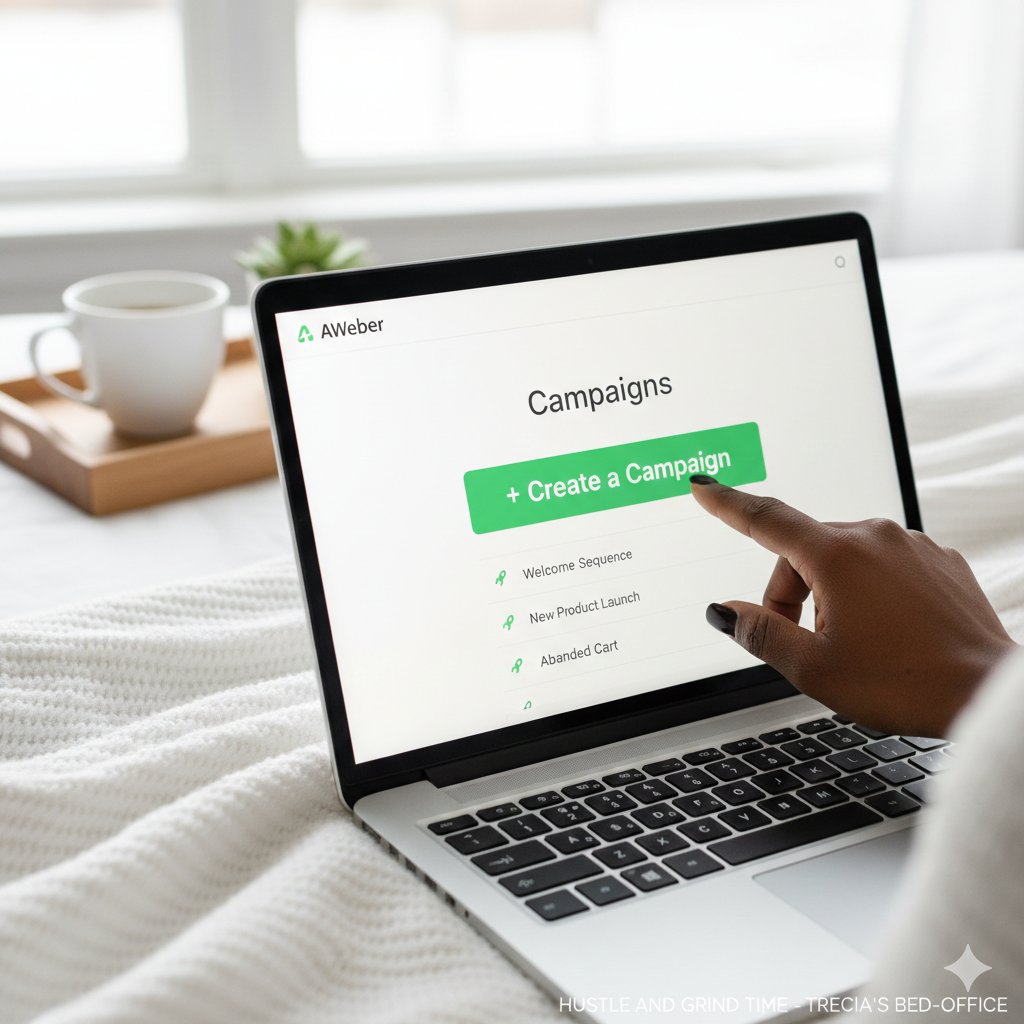
- Click “Create a Campaign”: Once on the Campaigns page, you’ll see a big green button that says “+ Create a Campaign.” Click it!
-
- Choose a Template or Start From Scratch: AWeber offers pre-built templates, which are great for getting started! For a simple welcome, “Welcome Series” is a good option. Or, select “Blank Campaign” if you want full control.
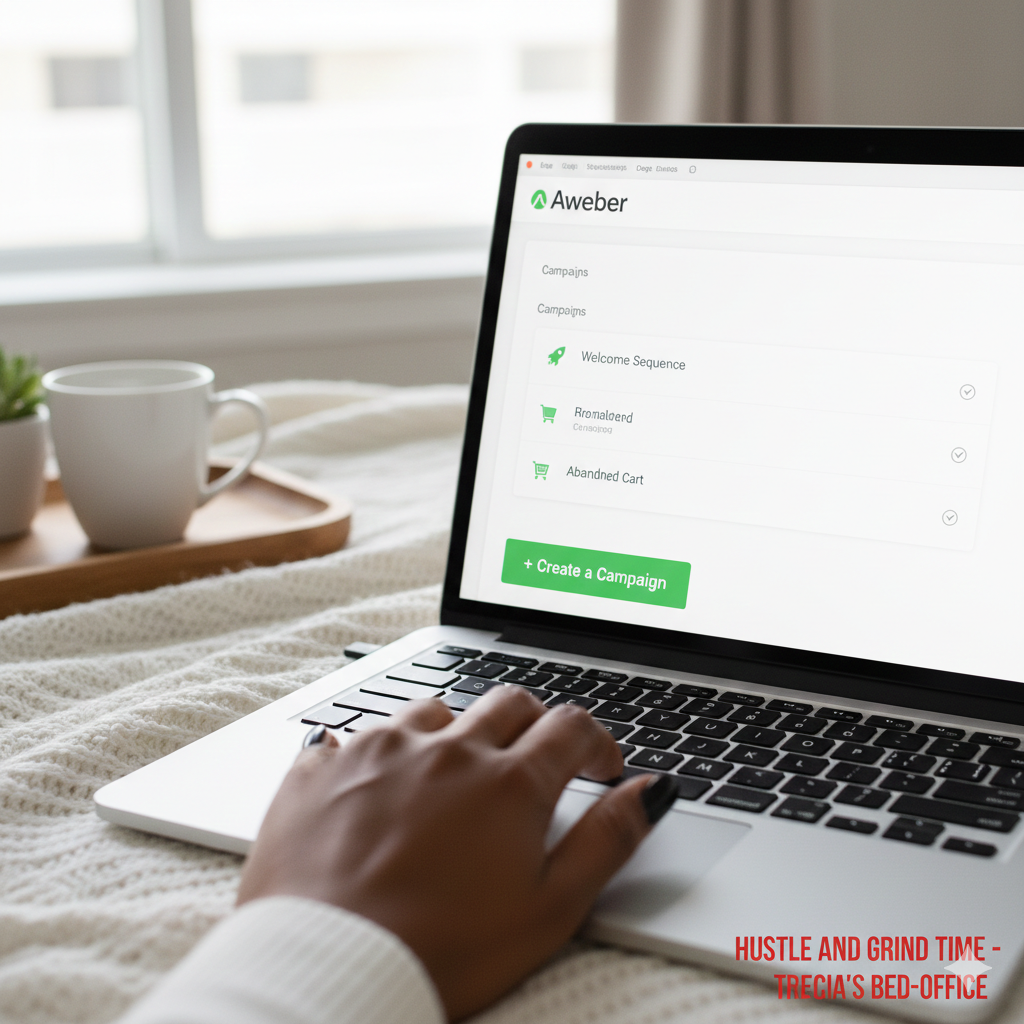
- Choose a Template or Start From Scratch: AWeber offers pre-built templates, which are great for getting started! For a simple welcome, “Welcome Series” is a good option. Or, select “Blank Campaign” if you want full control.
-
- Name Your Campaign: Give it a clear name like “Welcome Sequence – Free Guide Download.” This helps you stay organized.
Step 3: Building Your Automation Flow (Drag & Drop)
Now for the fun part! AWeber’s visual builder makes this super easy. You’ll drag and drop “messages” (your emails) and “waits” onto your canvas.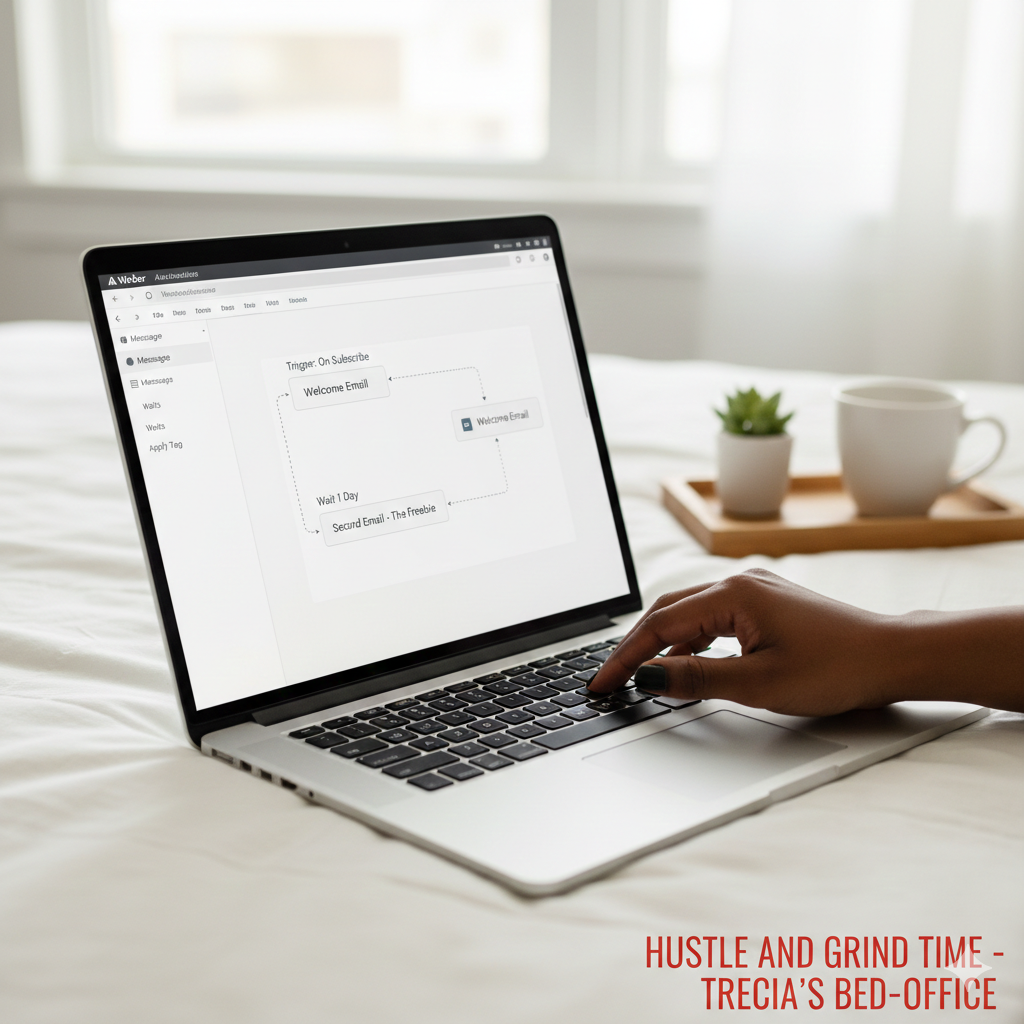
-
- Add Your First Email (The Welcome):
-
- Drag the “Send Message” element from the left sidebar onto the canvas.
-
- Click on the new message box and select “Create a Message” or “Draft a Message” if you’ve already written it.
-
- Craft your welcome email! Deliver your freebie, introduce yourself, and tell them what to expect. Make it warm, engaging, and on-brand for Hustle and Grind!
-
- Add Your First Email (The Welcome):
-
- Add a “Wait” Period:
-
- Drag the “Wait” element onto the canvas and connect it after your first email.
-
- Click on the “Wait” block to set the duration (e.g., “1 day”). This gives subscribers time to read the first email before the next one hits their inbox.
-
- Add a “Wait” Period:
-
- Add Your Second Email (Value or Story):
-
- Drag another “Send Message” element after the “Wait.”
-
- This email could share a personal story, offer another valuable tip, or gently introduce them to your main content (like your YouTube channel!).
-
- Add Your Second Email (Value or Story):
You can continue this pattern to build out a multi-email sequence. Remember, each email should have a single goal!
Step 4: Setting Your Campaign Trigger
This is how your subscribers enter your automation. For a welcome sequence, the most common trigger is when someone subscribes to a specific list or form.
Click “Triggers”: On your Campaign canvas, you’ll see an option to set a trigger. Click it.
-
- Choose Your Trigger Type:
-
- “On Subscribe”: This is perfect for your main welcome sequence. Everyone who signs up gets this.
-
- “On Tag Applied”: This is powerful for segmentation! You can apply a tag (e.g., “interested_KDP”) when someone clicks a link in another email, and that tag can trigger a new, specific campaign just for them.
-
- Choose Your Trigger Type:
Step 5: Testing and Activating Your Campaign
You’ve built it! Now, don’t just hit “go” without testing.
-
- Send Test Emails: Within the email editor, always send a test email to yourself to check formatting, links, and how it looks on mobile.
-
- “Preview & Test” Your Campaign Flow: AWeber often has a “Preview & Test” button on the Campaign page itself, allowing you to visually confirm the flow and timing.
-
- Activate! Once you’re confident, go back to your Campaigns list and click the “Activate” button next to your new campaign. Your email marketing machine is now live and working for you 24/7!
Beyond the Welcome: Other Automation Ideas for Your Hustle & Grind Business
Now that you know the basics, here are some other powerful automations you can build in AWeber:
-
- Product Launch Sequence: A series of emails introducing a new product, building anticipation, and driving sales.
-
- Affiliate Promotion: Automatically send emails promoting relevant affiliate offers to subscribers who’ve shown interest in specific topics (using tags!).
-
- Webinar Reminder: Automatically send reminders to people who registered for your live event.
-
- Re-engagement Campaign: If subscribers haven’t opened an email in 60-90 days, send a short campaign to try and win them back (or remove them from your list to keep it clean!).
-
- Content Upgrade Delivery: When someone opts in for a specific freebie related to a blog post, send it automatically.
Your Bed-Office Empire Just Got Smarter!
See? Email automation doesn’t have to be complicated. With AWeber’s user-friendly interface, you can build powerful sequences that consistently deliver value, drive sales, and free up your time for the real Hustle and Grind—dreaming up your next big idea (from bed, of course!).
What AWeber automations are you excited to build first? Let me know in the comments below!
Stay cozy, stay profitable, Trecia